The evaluation of visual inspection solutions for shiny items
“There are various kinds of inspection systems, we do not know how to choose one.”
“I do not know how to compare the inspection solutions.”
We often hear those above comments from our customers. Today we would like to evaluate those solutions from technical perspectives. Because we believe function of the system is the most important matter for QA process.
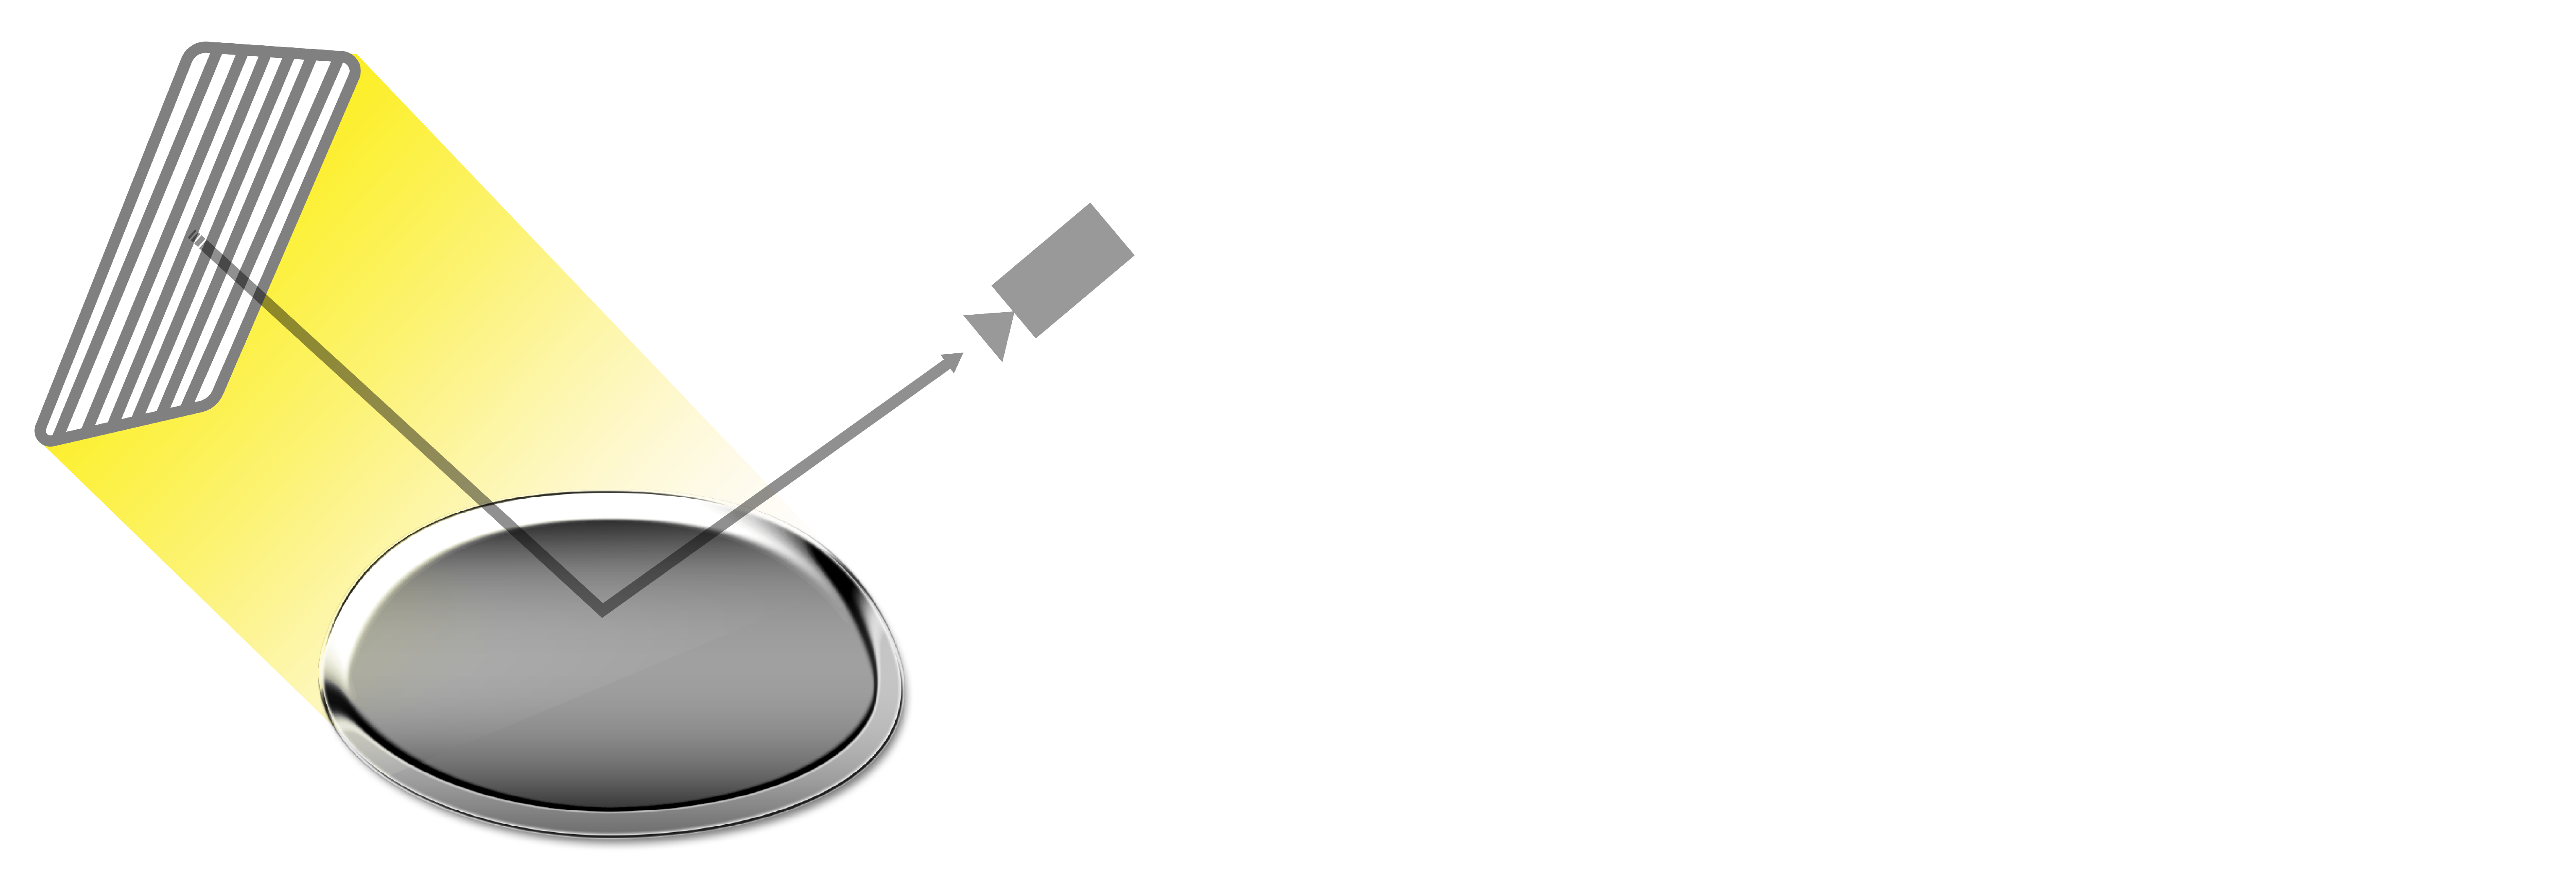
1. 1 camera + flat light source
When camera captures the image of glossy object, it needs to receive the reflected light rays in appropriate angles. Especially when the light source is flat panel as in below image, the light rays come from quite narrow area and angle so only small area of the object can be inspected. The more curved the object is the smaller area can be inspected at time. Which means this way of inspection needs you to inspect flat and curved surface by scanning the objects’ surface. This means the object’s or camera and light source’s orientation must be changed constantly several times and it takes time to inspect the parts.

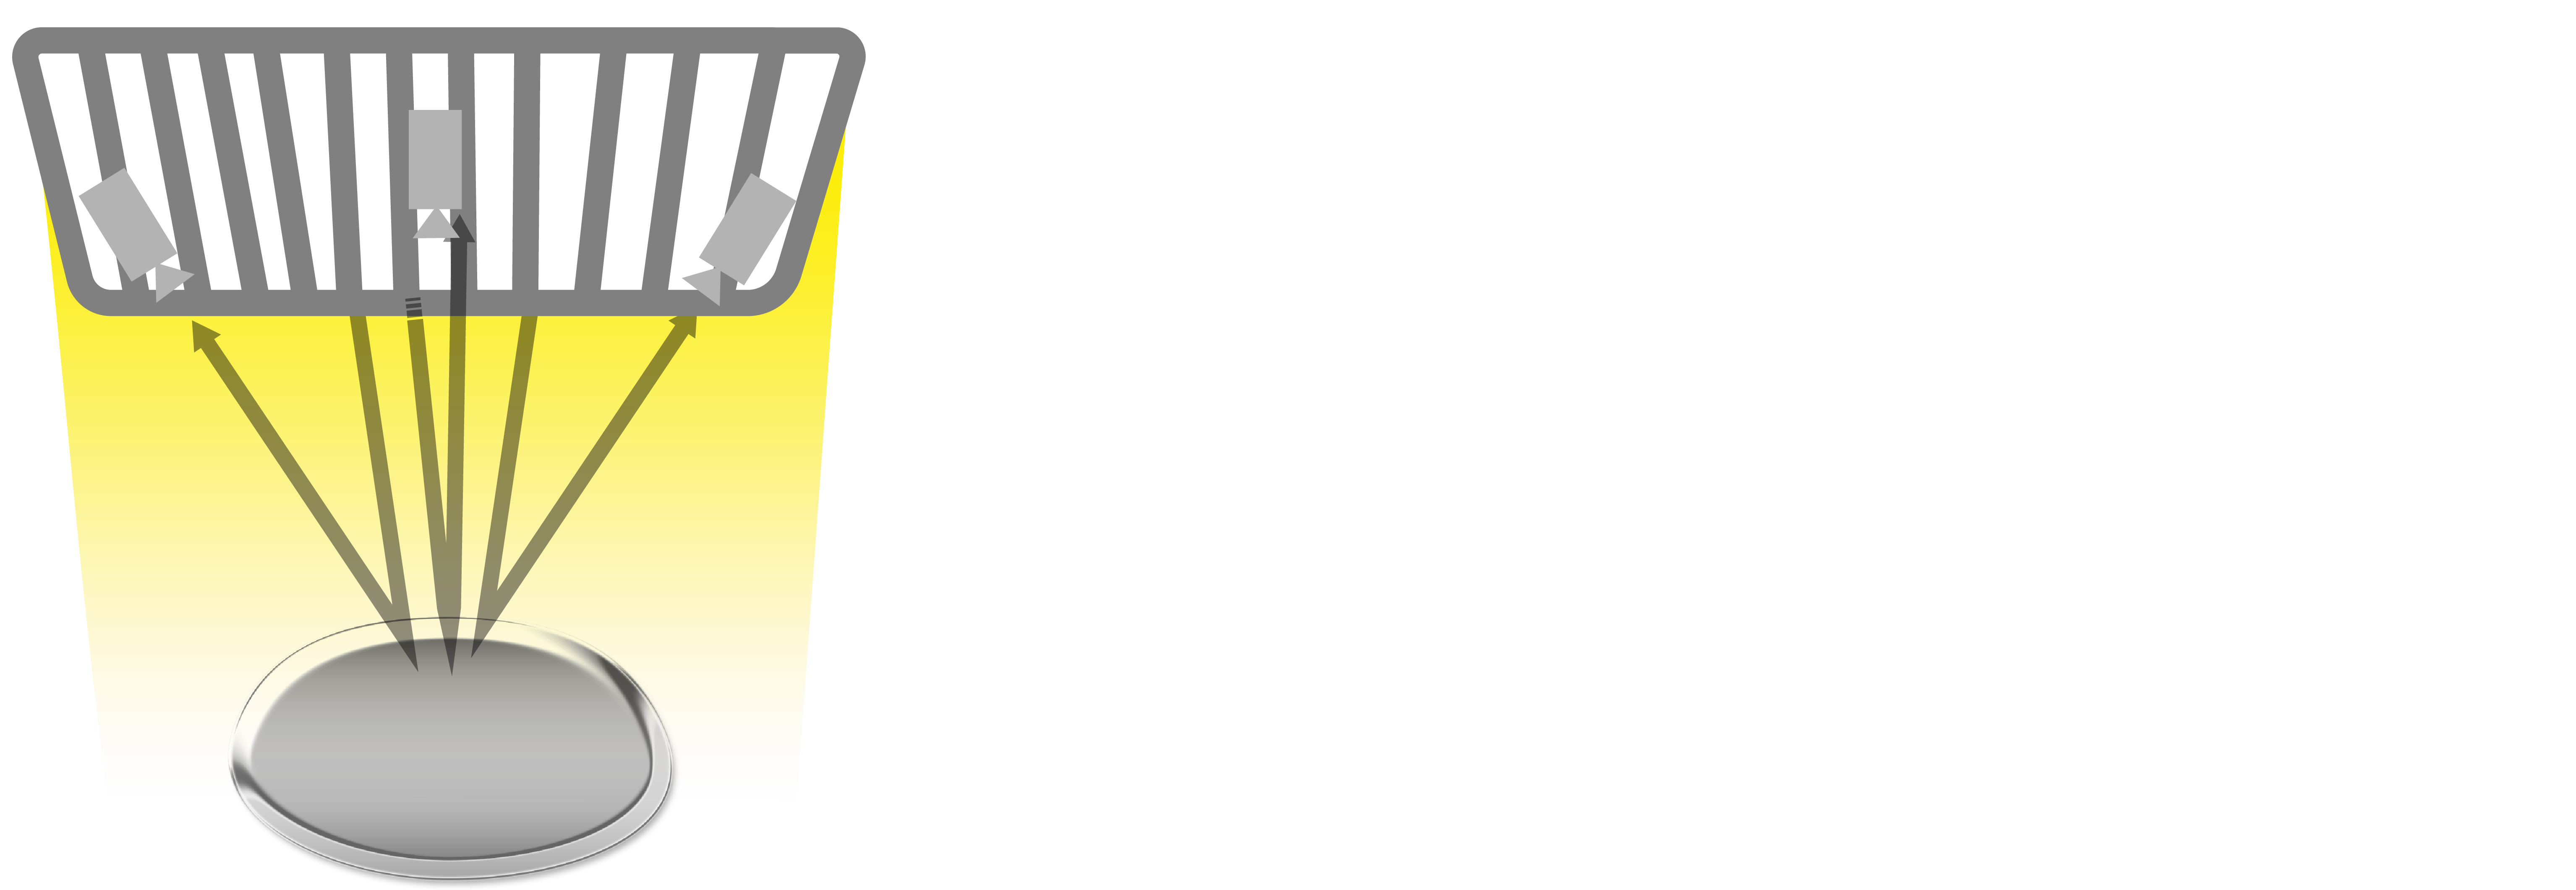
2.Multiple cameras + flat light source
Increasing number of cameras than solution 1 (above) expand the inspection area at once. However, this solution enables you to inspect only from one direction at once, because the light source gives a light evenly from a certain direction. As in the below image, when the light source is placed above the object the cameras can inspect the area where the light rays coming from light source are reflected from object to camera. Therefore, changing object’s orientation for multiple times is required.

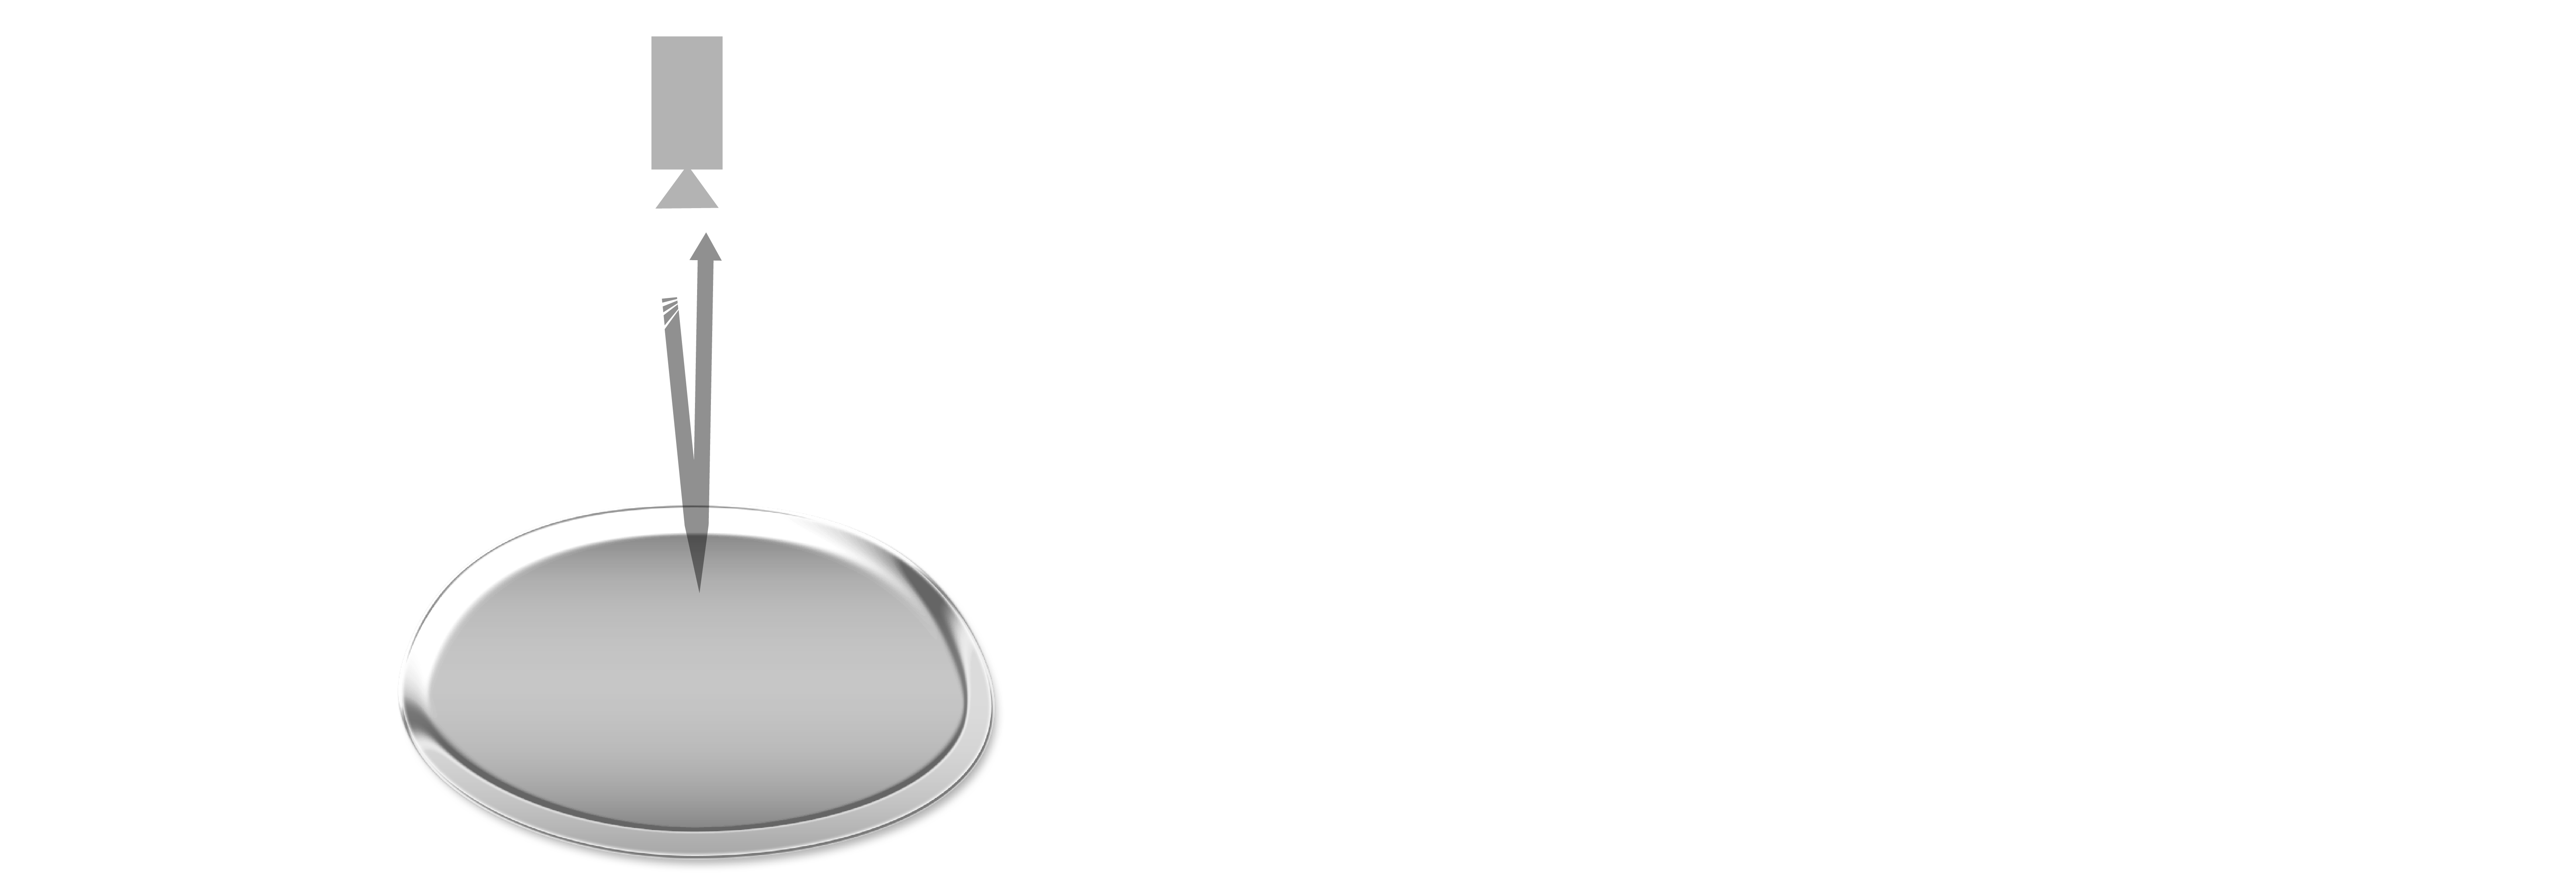
3.1 camera + dome + light source
The benefit of using the dome as a light source is wide inspection area. Especially the light spread evenly under the dome so that the even one camera can inspect wide area. However, because it has only one camera, it is possible to see parts from one angle. Therefore, this method is suitable for inspecting flat surface.

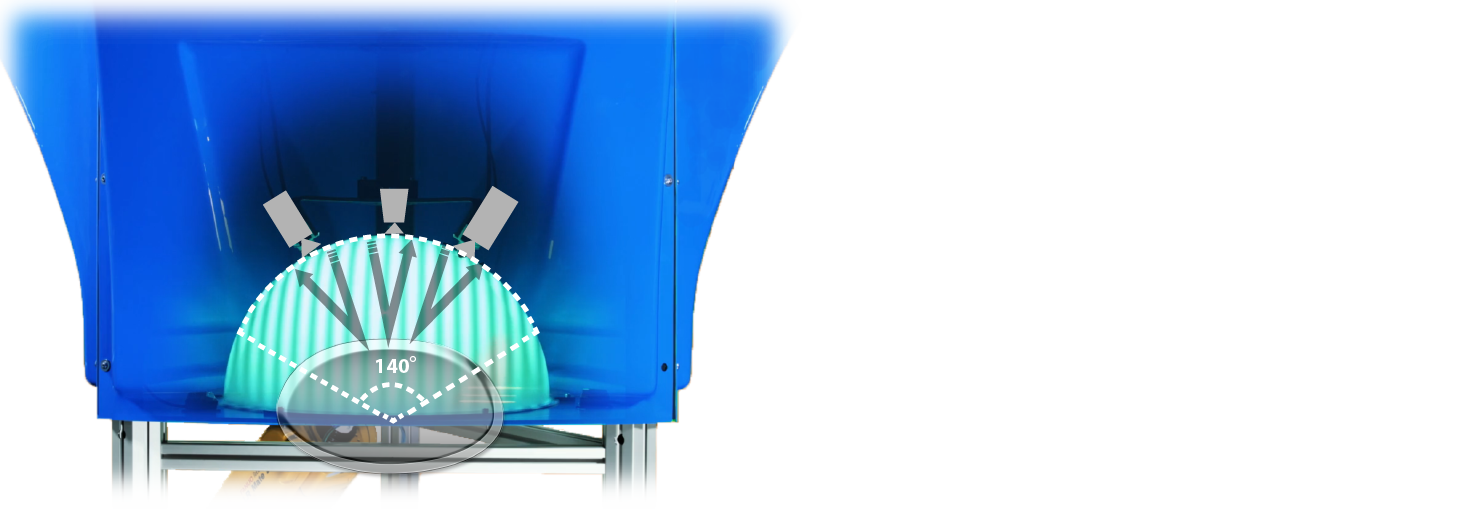
4.Mutiple cameras + dome light source
When dome light source is used, the light rays arrive to the object’s surface evenly from wide angle so it enables you to inspect wide are of object at once. As in below image when multiple cameras see the objects from different angles, even wider area of the parts can be inspected at once.
Helmee CSD use this method and we have patented this technology. Because of this, Helmee CSD can inspect object from 140 degrees at once. Which means it is possible to inspect curved surface and changing the orientation only in couple of times is enough to inspect object from 360 degrees.

Read more articles
To learn more about CSD® technology and automated inspection of highly reflective products, please contact us.
We look forward to discussing the subject with you further!
Follow us on social media
